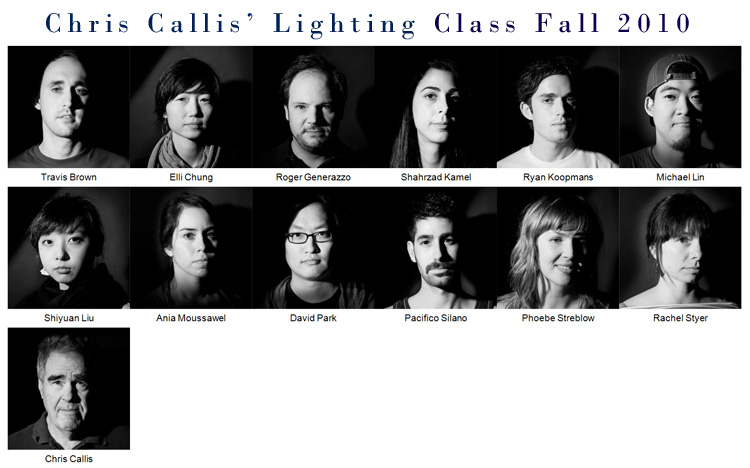
Wednesday, December 8, 2010

Lesson 14 Polarized Light

Blog Review December 15, 2010
10:00am Rachel
10:15am Shahrzad
10:30am Ania
10:45am Travis
11:00am Shiynan
11:15am David
11:30am Roger
11:45am Mike
12:00pm Ryan
12:15pm Pacifico
12:30pm Phoebe
12:45pm Elli


The 1st image of the pastry was shot using Tuff Lux diffusion with no polarization.


This image was shot with a ring light with a Rosco 73011 Polarizing Filter cut out and attached to the light. The camera had a Circular Polarizing filter attached to the lens. The Circular filter was rotated until all the reflections disappeared.


This image was shot with the Ellipsoidal spot light with the Rosco Polarizing Filter attached. The Circular Polarizing Filter attached to the lens was kept at the same rotation as when we shot the ringlight but the Rosco filter was rotated on the spot light until the reflection disappeared.


The final is composed of the 3 images above layered in Photoshop. The reflections on the jelly were used from the 1st image by masking everything but the reflections. The cast shadows from the second image were tinted with a photo filter and everything but the shadows were masked out. Finally the ring light image was the bottom layer and left intact.


We didn't change the lights or the orientation of either of the Polarizing filters and shot this cupcake. The one below with the ring light.


This one was shot with the Ellipsoidal spot.


The cupcake below is a combination of the above 2 images. The Ellipsoidal image is the top layer. I selected the shadow, manipulated the color and intensity, and used that selection to make a new layer. I changed the blending mode of the Ellipsoidal layer to Overlay with the ring light layer on the bottom.


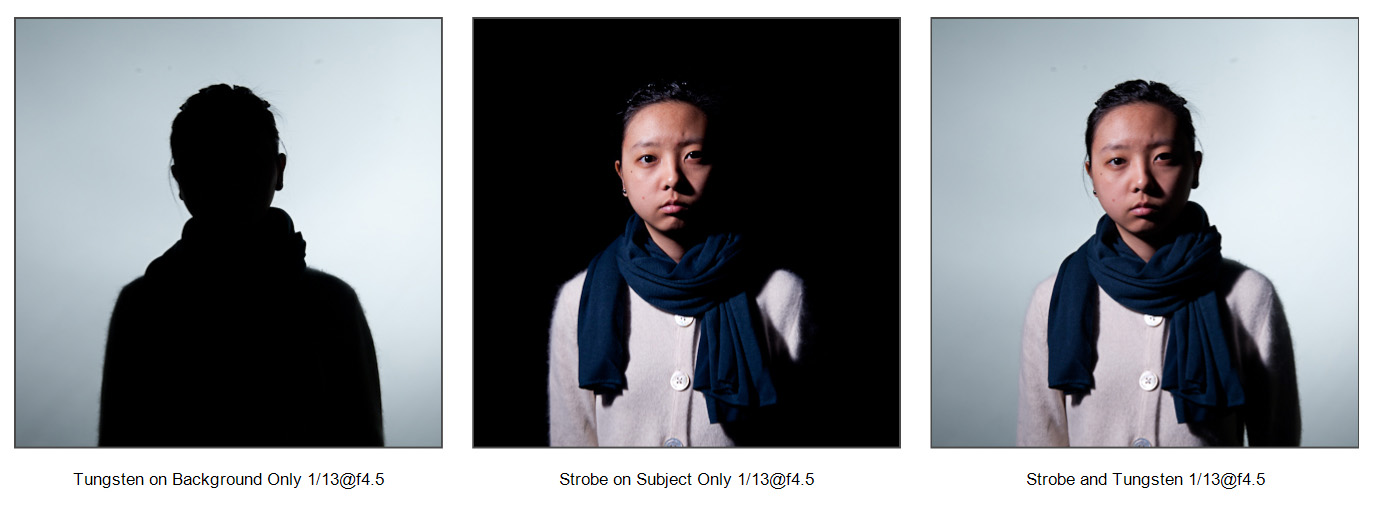
The dead Ryan was shot with both lights on and polarized as above. No Sweat!

Thursday, December 2, 2010

Lesson 13 Speed Cycler

Assignment 13 Execute the picture that you brought in to emulate.

The demonstration was about shooting fast with strobe using the MultiMax Pocket Wizard set on Speed Cycler. Use this mode to rapidly cycle
through remote flash units and trigger faster than a single
flash can recycle by using multiple flash units. It can also
be used for triggering remote cameras sequentially. In the test here is a sequence of 4 images taken within a second with the Canon 5DMII set on continuous.
The pictures below shows how the Jumbrella was illuminated by each of the pairs of lights firing in a 4 sequence interval.

Lesson 12 Night Photography

Assignment 11 Night Photography
Part 1 Use existing artificial light as a light source recognizing its color and mood, make a photograph of a person that is surprising by what it reveals.

Part 2 Bring in a photograph that you like the lighting and that you wish to emulate. Sketch out how you think it was lit.

Wednesday, November 17, 2010

Lesson 11 Stop Action

Here some of the photographs I was telling you about in class. City Bakery Tarts being shot by a 30-06. The guy with the gun only had soft nosed bullets so the tips dented on impact. It would have looked better with nice pointy bullets.


Assignment 11 Stop Action
Photograph something in action that you can’t see with the naked eye.


The idea of this demostration was to experience what Edgerton experienced when he first invented the electronic flash back in the 1930's. The technique of opening the shutter in a darkened room and having a sound sensor sync the flash is similiar to his technique. We used a HiVis kit for our sound sensor. The HiVis website has tons of information about capturing stop action images.

In the top two photographs we used a Dynalite pack with one head. The one on the left was set at full power and the image looked blurred due to the long flash duration (approximately 1/125). For photograph on the top right, we turned down the power 3 stops which made the flash duration approximately 1/1000. Still the balloon is very blurred. We tried to use the Profoto Compact 600 at1/16 power but it kept double firing even when Shahrzad kept the dart in her hand. Weird and I no explanation for that. When we used the Vivitar 283 at 1/32 power the approximate flash duration was reduced to 1/10,000. Big difference in stopping power. Also it did not double fire. I just notice that Vivitar came out with a new 283 flash and it is called the Vivitar DF 283 Series 1 Digital TTL Shoe Mount Autofocus Flash for Canon TTL. It is not the same as the old discontinured one that I have. Look on ebay for the older model where there are plenty for sale very cheap.


Thursday, November 11, 2010

Lesson 10 Still Life

Assignment 10 Shiny Metal and Glass

Photograph a Shiny Metal object and define its shape and characteristics by use of it reflective qualities.

Photograph a glass object and define its shape and characteristics by using its transparency.


The bottle was placed on the light table and a small light box was placed under the edge closest to the camera and right under the bottle. A second light with a 10 degree grid was place 3 feet behind the back sweep and level with the camera. A shiny silver card was placed 1 foot over the bottle to give a highlight on the cap. We started with the bottle empty and lite it the best we could. When we filled the bottle with water, the lighting remained the same but the results changed dramatically. This change is due to the refraction that occurs when water is in the bottle. It acts like a lens and gathers light from a wider angle and concentrates the light in the bottle. Since the bottle is imperfect and asymmetrical, it is hard to predict the effect of the light will have on the bottle.

This Italian percil sharpener represents a few challenges in lighting. It is made of chrome, glass, wood and lustre black painted metal. We used a single small light box on camera right pointing slightly to the background. That lite the black side of the object and background very well. We made our 1st capture. Next we used a white card placed over the object to reflect light onto the top. It brightened the top and gave it a highlight on the glass magnifier. It also gave a nice highlight on the top ot the crank and the wooden handle. We made the second capture. The third capture was made with the same white card placed on the table in front of the base of the sharperner so that we see it in the reflection of the sharpener's chrome front. I think the reflection is too perfect and doesn't give the feeling of chrome. If we put a strip of black paper on the white card, it would have broken up the perfect white reflection. Also we should of gotten rid of the finger prints with the glass cleaner and paper towel. Saves lots of Photoshop time. Color correct the three images and adjust the exposures in Lightroom. Bring in the three layers from Lightroom by selecting the images, Edit in... Open as Layers in Photoshop. In Photoshop, have the 1st capture as the top layer and add a blank mask. Paint black on the mask to let the lighting from the second layer come through. Add a blank mask to the second layer and mask out the parts of where you want the third layer to come through. In some cases you will also have to mask the 1st and 2nd layer for the 3rd layer to show. This method is very powerful and makes life faster and earier to deal with difficult objects to light.


Thursday, November 4, 2010

Lesson 9 Light Painting

Assignment 9 Light Painting

1. Make a photograph using flash as a painting tool.
2. Make a photograph using a continuous light source as a painting too.

Plan what you want to achieve with light painting. The lighting scheme should be hard to achieve conventionally.


We learned how to remotely trigger the 5D MII by using a special cable called the Canon N3 to mini phone by connecting the N3 side to the Canon's remote control terminal and the mini side to the Pocket Wizard II's camera port. By setting another Pocket Wizard Plus II to the same channel as the one attached to the camera, the camera shutter can be released by the remote Pocket Wizard Plus II when you press the test button. For light painting with a continuous light source, we set the camera at a long exposure (30 secs) and trip the shutter remotely when ready to start painting. The room has to be dark enough that it doesn't pick up any stray light during the long exposure. The f stop and ISO are determined by trial and error. With practice a rhythm will develop your painting skills.

The set up of the Pocket Wizard Plus II's for light painting using a flash, is an extension of the continuous light setup. This time we put the camera's Pocket Wizard Plus II in the hot shoe of the camera. The cabling remains the same. We need a third Pocket Wizard Plus II to be attached to a Canon 580EXII using a pc to mini cable. The pc end is inserted into the flash's pc terminal and the mini end is plugged into the 3rd Pocket Wizard Plus II's flash terminal. The 3rd Wizard has to be set on a channel that is one number higher than the other two Wizards. The 580EXII is set on manual and the power is set my trial and error. The four factors determining the exposure for each time we flash are subject to flash distance, f-stop, ISO and power setting on the flash. Now we have the 580EXII and 3rd Pocket Wizard Plus II in one hand and the remote camera firing Pocket Wizard Plus II in the other. As we point the flash where we intend the light to land, we push the test button on the 1st Wizard and it trips the shutter and then automatically uses the pocket wizard mounded in the camera's hot shoe to sync with the flash that is set on the next higher numbered channel. The subject needs to remain perfectly still and then as many captures from as many positions of light as needed. In Lightroom, the captures are selected while in Library Mode, right click on one of the selected images, "edit in" and go to bottom of the list to "open as layers in photoshop". Once in photoshop you can use lighten in the blending modes on each layer to have all the lights turned on. Now it is time to make decisions
as to how you work with each of the lights. Have fun and be brilliant.

Wednesday, October 27, 2010

Lesson 8 Dedicated Flash

Assignment 8 Dedicated Flash Canon System

Use direct flash on camera Priority setting
Use direct flash off camera Priority setting
Use flash fill Aperture Priority
Use flash with modifier (Bounce card, bank or ceiling) Priority setting.

Layout your best result from each of the 4 techniques, write down your camera settings for each photograph and post as a single entry.

Read the two pages from the Canon 580EXII manual to help understand what the settings mean


For the first 3 parts of the demonstation, the ISO was set at a 100. Notice the change of f stop on the two Aperture Priority examples. I didn't adjust the images in any way so you can see just how well the Canon Flash metering works.


The pictures below were all shot at ISO 100, off-camera and set on Priority. No adjustments in post.


Wednesday, October 20, 2010

Lesson 7 Strobe Outdoors

1. Make a portrait where the person’s face and the background are the same exposure.

2. Make a portrait where the person’s face is exposed one stop under and the background is normally exposed. Turn the stobe power down one stop and keep the same exposure as the 1st photograph.

3. Make a portrait where the person’s face is normally exposed and the background is one stop under. Don't forget to turn the strobe back up one stop to match the 1st photograph.

4. Make a portrait where the person’s face is normally exposed and the background is two stops under.

All four should be photographed in exactly the same place and you will need to adjust the strobe for the second shot only.

This is a test for your reference and should be layed out accordingly.

Print your f stop and shutter speed under each photograph.

Subject should be 3 stops darker than background.

Wednesday, October 13, 2010

Lesson 6 Strobe and Tungsten


The photograph above is an example of how I used strobe and tungsten in my work in the 1980's.

The background was lite with tungsten light and the subject was lite with a fresnel strobe with an Roscoe 3411 conversion gel making it essentially a tungsten balanced strobe. The camera was set to tungsten color balance. The 1st step was to figure out an exposure that would give us the most beneficial shutter speed while considering the maxium possible aperature for the lens being used. The 2nd step was to adjust the power setting of the strobe to match the f-stop. The use of the shutter speed/f-stop slider helps to visualize the exposure relationships. Care was taken to keep the lights confined to their intended targets and a capture of each light was made separately to confirm its purity.

Wednesday, October 6, 2010

Lesson 5 Size Matters

Assignment 5 Take 2 portraits of a person one with a large softbox or Octobank and one with a smaller light source like the beauty dish or Quantum 12" square softbox. Get the same results for each light by placement of the subject and the background. Look at the results of the demo for ideas.


Wednesday, September 29, 2010

Monday, September 27, 2010

Lesson 3 Direction of Light


The cube is tilted to reveal 3 sides equally. When a point source (our Halogen bulb) is placed over and as close to the camera lens as possible, all three sides reflect equally. When the light is moved to the right and up, the 3 sides reflect light in unequal ways and photograph with 3 different values.

Lesson 3 Light Falling on an Sphere


What happens when a point source (like the sun or our Halogen Bulb) falls upon a solid white sphere:


  1. A highlight is created


  2. A cast shadow is created


  3. A core is created in the transition of the highlight and the shadow


  4. A cast shadow is created


  5. A specular or incident highlight is created within the highlight


Thursday, September 16, 2010

Lesson 2 Light Travels in a Straight Line


The camera obscura is an example of light traveling in a straight line


Examples of light traveling in a straight line


How the softbox is projected through a hole in seamless

Lesson 2 Angle of Incidence Equal Angle of Reflection


Light reflected from a metal surface with angle of incidence equal to the angle of reflection. The dashed line is perpendicular to the surface.

Light reflection from a) smooth surface (specular reflection) and b) rough surface (diffuse reflection). In both cases the angle of incidence equals the angle of reflection at the point that the light ray strikes the surface.


Examples of different surfaces reflecting a beam of light.

Sunday, September 12, 2010

Lesson 1 The Inverse Square Law

I did the assignment using 4"sq gray cards placed at 45 degrees facing up in order to avoid any specular reflections. Also I did an additional test with the light at 32 feet to see if the numbers continued to work. I was very careful to contain the light and not have any light hitting walls the could influence the exposure. It worked perfectly. Every time I doubled the distance the intensity of the light dropped by 1/4 or 2 stops.


To balance the Black, Gray and White Cards I had the Black card 18" from the light, the Gray card 40" from the light and the White card 92" from the light.